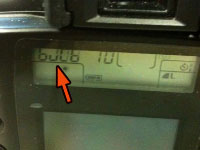
※ If your camera model is not on the list, please check
the shutter speed.
Your camera is suitable for this application
if you can set the shutter time for more than 8 seconds.
*-
How to use
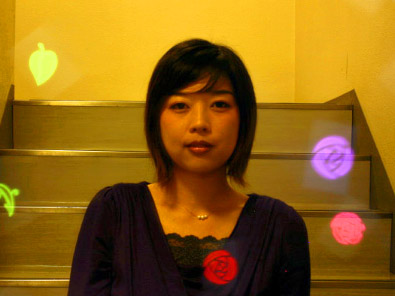
This is an application to draw the light pictures
when taking photographs.
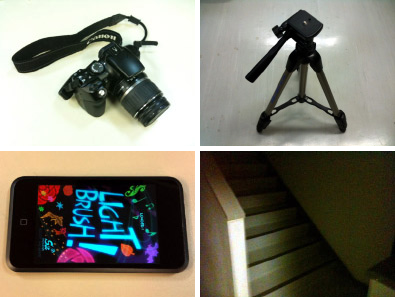
Requirements
- A camera that can set the shutter speed to more than
8 seconds
- A camera stand
- "LightBrush!"
- Dark room
0. Provide a camera that can set the shutter speed
slow.
1. Set the room dark and focuses the camera to the subject.
The recommended distance between the camera and the
subject is about 1 meter.
2. Press the shutter of the camera and
touch "Draw!" button of the "LightBrush!".
3. Move the iPhone screen in front of the camera
from the sound navigation of the "LightBrush!".
4. When the "LightBrush!" finishes,
close the camera shutter and check the photograph.
※ If you have trouble taking the pictures that you
want,
adjust the camera settings and the brightness of the
room.
Try a few times to get used to it!
Main screen
This screen manages the brush drawing order.
Set the brush in displaying order and touch "Draw!"
button to start drawing.
Brush setting screen
Configure brush color, shape, display time, and repeat
count.
Brush selection screen
Select the brush shape from the list.
Color selection screen
Select the brush color from the list.
*-
Details of the main screen
1. Preset selection
Preset is a set of prepared brushes.
Try presets first to check the features of "LightBrush!".
Set1-1
Basic Brush 1
This
is the set of brushes to draw the most basic
lines.
Set1-2
Garden
Beautifully decorate the screen by
placing the colorful flowers.
You can create your own garden.
Set1-3
Letters
Of course, "LightBrush!" can write
letters!
Express the current feeling in words.
Set1-4
Basic Stamp 1
This is the set of stamp brushes that can
be placed easily.
Set2-1
Basic Brush 2
This
is the set of brushes to draw the most basic
lines.
Set2-2
Christmas
Make
Christmas decorations.
Place snow, stars, Moon, jewels, and wrap
the entire with the mall.
Set2-3
Music
Rhythmic
notes create the joyous concert.
Astonishing song may be created!
Set2-4
Basic Stamp 2
This
is the set of stamp brushes that can be placed
easily.
Set3-1
Halloween
Scatter
pumpkins, bats, and playing card marks.
Finally draw a dubious light around the screen.
Set3-2
Footprints
Draw
footprints in the air.
Draw right foot and left foot alternately.
Set3-3
Face
Draw right eye, left eye, nose, mouth, and
outline of the face.
Fun will be the face of what has been built.
Set3-4
Fairies
Fairies come on to your hand.
Make your own fantastic scenery.
User
set 1
You
can save your favorite set to user sets 1-4.
User
set 2
You
can save your favorite set to user sets 1-4.
User
set 3
You
can save your favorite set to user sets 1-4.
User
set 4
You
can save your favorite set to user sets 1-4.
2. Display mode and brush lists
There are 9 brushes in a brush list, and "Draw!"
button lets you start drawing.
Display mode "Solo": display the selected
brush.
Display mode "Multiple": display the brushes
in the arrowed order.
Double-tap the brush or tap on the "Edit"
button to move the brush setting screen.
Settings: Brush color, bush type, display time, additional
counts.
(Modified brush settings are saved automatically.)
3. "Save the brush set" and "Reset
the brush set"
"Save the brush set" opens a dialog to choose
where to save.
You can copy the brush setting to one of the user set
1-4.
"Reset the brush set" resets the currently
selected preset to its initial state.
If the user set is selected, then it returns back to
the saved setting.
*-
Details of the brush setting screen
In this screen, you can modify the brush selected from
the brush list.
Brush setting
- Turn the brush on/off
Select whether or not to use the brush.
Select Color
Pick a color from the color selection
screen.
Edit brush
Choose a brush shape from the brush
selection screen.
Display Time
Set the display time of the brush.
IN
MAX
OUT
time where the brush size changes
from 0% to 100%.
time where the brush size maintains 100%.
time where the brush size changes from 100% to 0%.
Wait
Time to wait before you see the following
brush.
*-
Example of taking a picture using Canon EOS series
0. Location to take the pictures
Turn off the light and allow the room to be dark.
Let the door open and allow small amount of light to
enter the room.
Adjust the amount of light by the position of the door.
1. Default camera settings
You can take fantastic pictures if you learn some camera
operations!
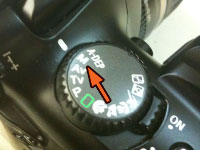
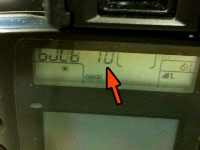
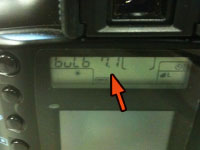
Set the dial to manual "M", and set the shutter
speed to "BULB".
(It is easy to take pictures if you have a remote control
for shutter.)
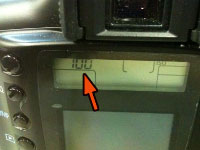
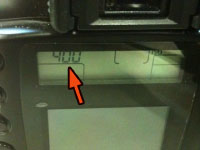
Set ISO sensitivity to 100; increasing this value makes
the picture brighter.
Set F value about 10; decreasing this value makes the
picture brighter.
Increasing F value makes the picture darker, but it
lets the picture to focus easier.
Adjust the brightness by suitably setting ISO sensitivity
and F value.
2. Trial picture taking
Start "LightBrush!" and select the preset
that you want to use.
Position the camera and the subject, and press the shutter
button on the camera.
Tap "Draw!" button of "LightBrush!"
to start drawing, placing the camera referring the sound
guidance.
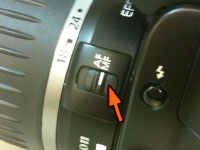
(If you can't press the camera shutter button, set the
lens focus to manual.)
3. Adjust the brightness
How did it turn out?
If it has turned out well, the subject and "LightBrush!"
pictures are combined beautifully.
If it is too bright or too dark, adjust the brightness
in the following way.
First, open the door a little more to let the light
enter more.
You can also adjust the brightness by adjusting the
camera ISO sensitivity from 100 to 200 or 400.
If it still doesn't turn out well, also decrease the
F value.
4. Retake the picture
Take the picture again after you have changed the settings.
If it does turns out well, you will be succeeded.
If it still doesn't turn out well, change the settings
and retry.
5. Tips on placing the iPhone drawings inside the
picture
It is easier to understand the picture range if you
place landmark objects.
Try scattering lines and patterns around the subject.
6. Finally adjust the brightness and contrast using
a PC.